Run the door
Check guests in, print badges, and handle the things that go wrong at 6pm.
The Check-in tab is built for the door: one row per attendee, not per booking, because people arrive one at a time.
Before the day: do a practice run on the actual laptop and printer you'll use, with a test registration. Badge printing is desktop only, and the first time you discover that shouldn't be at 6pm.
What you see
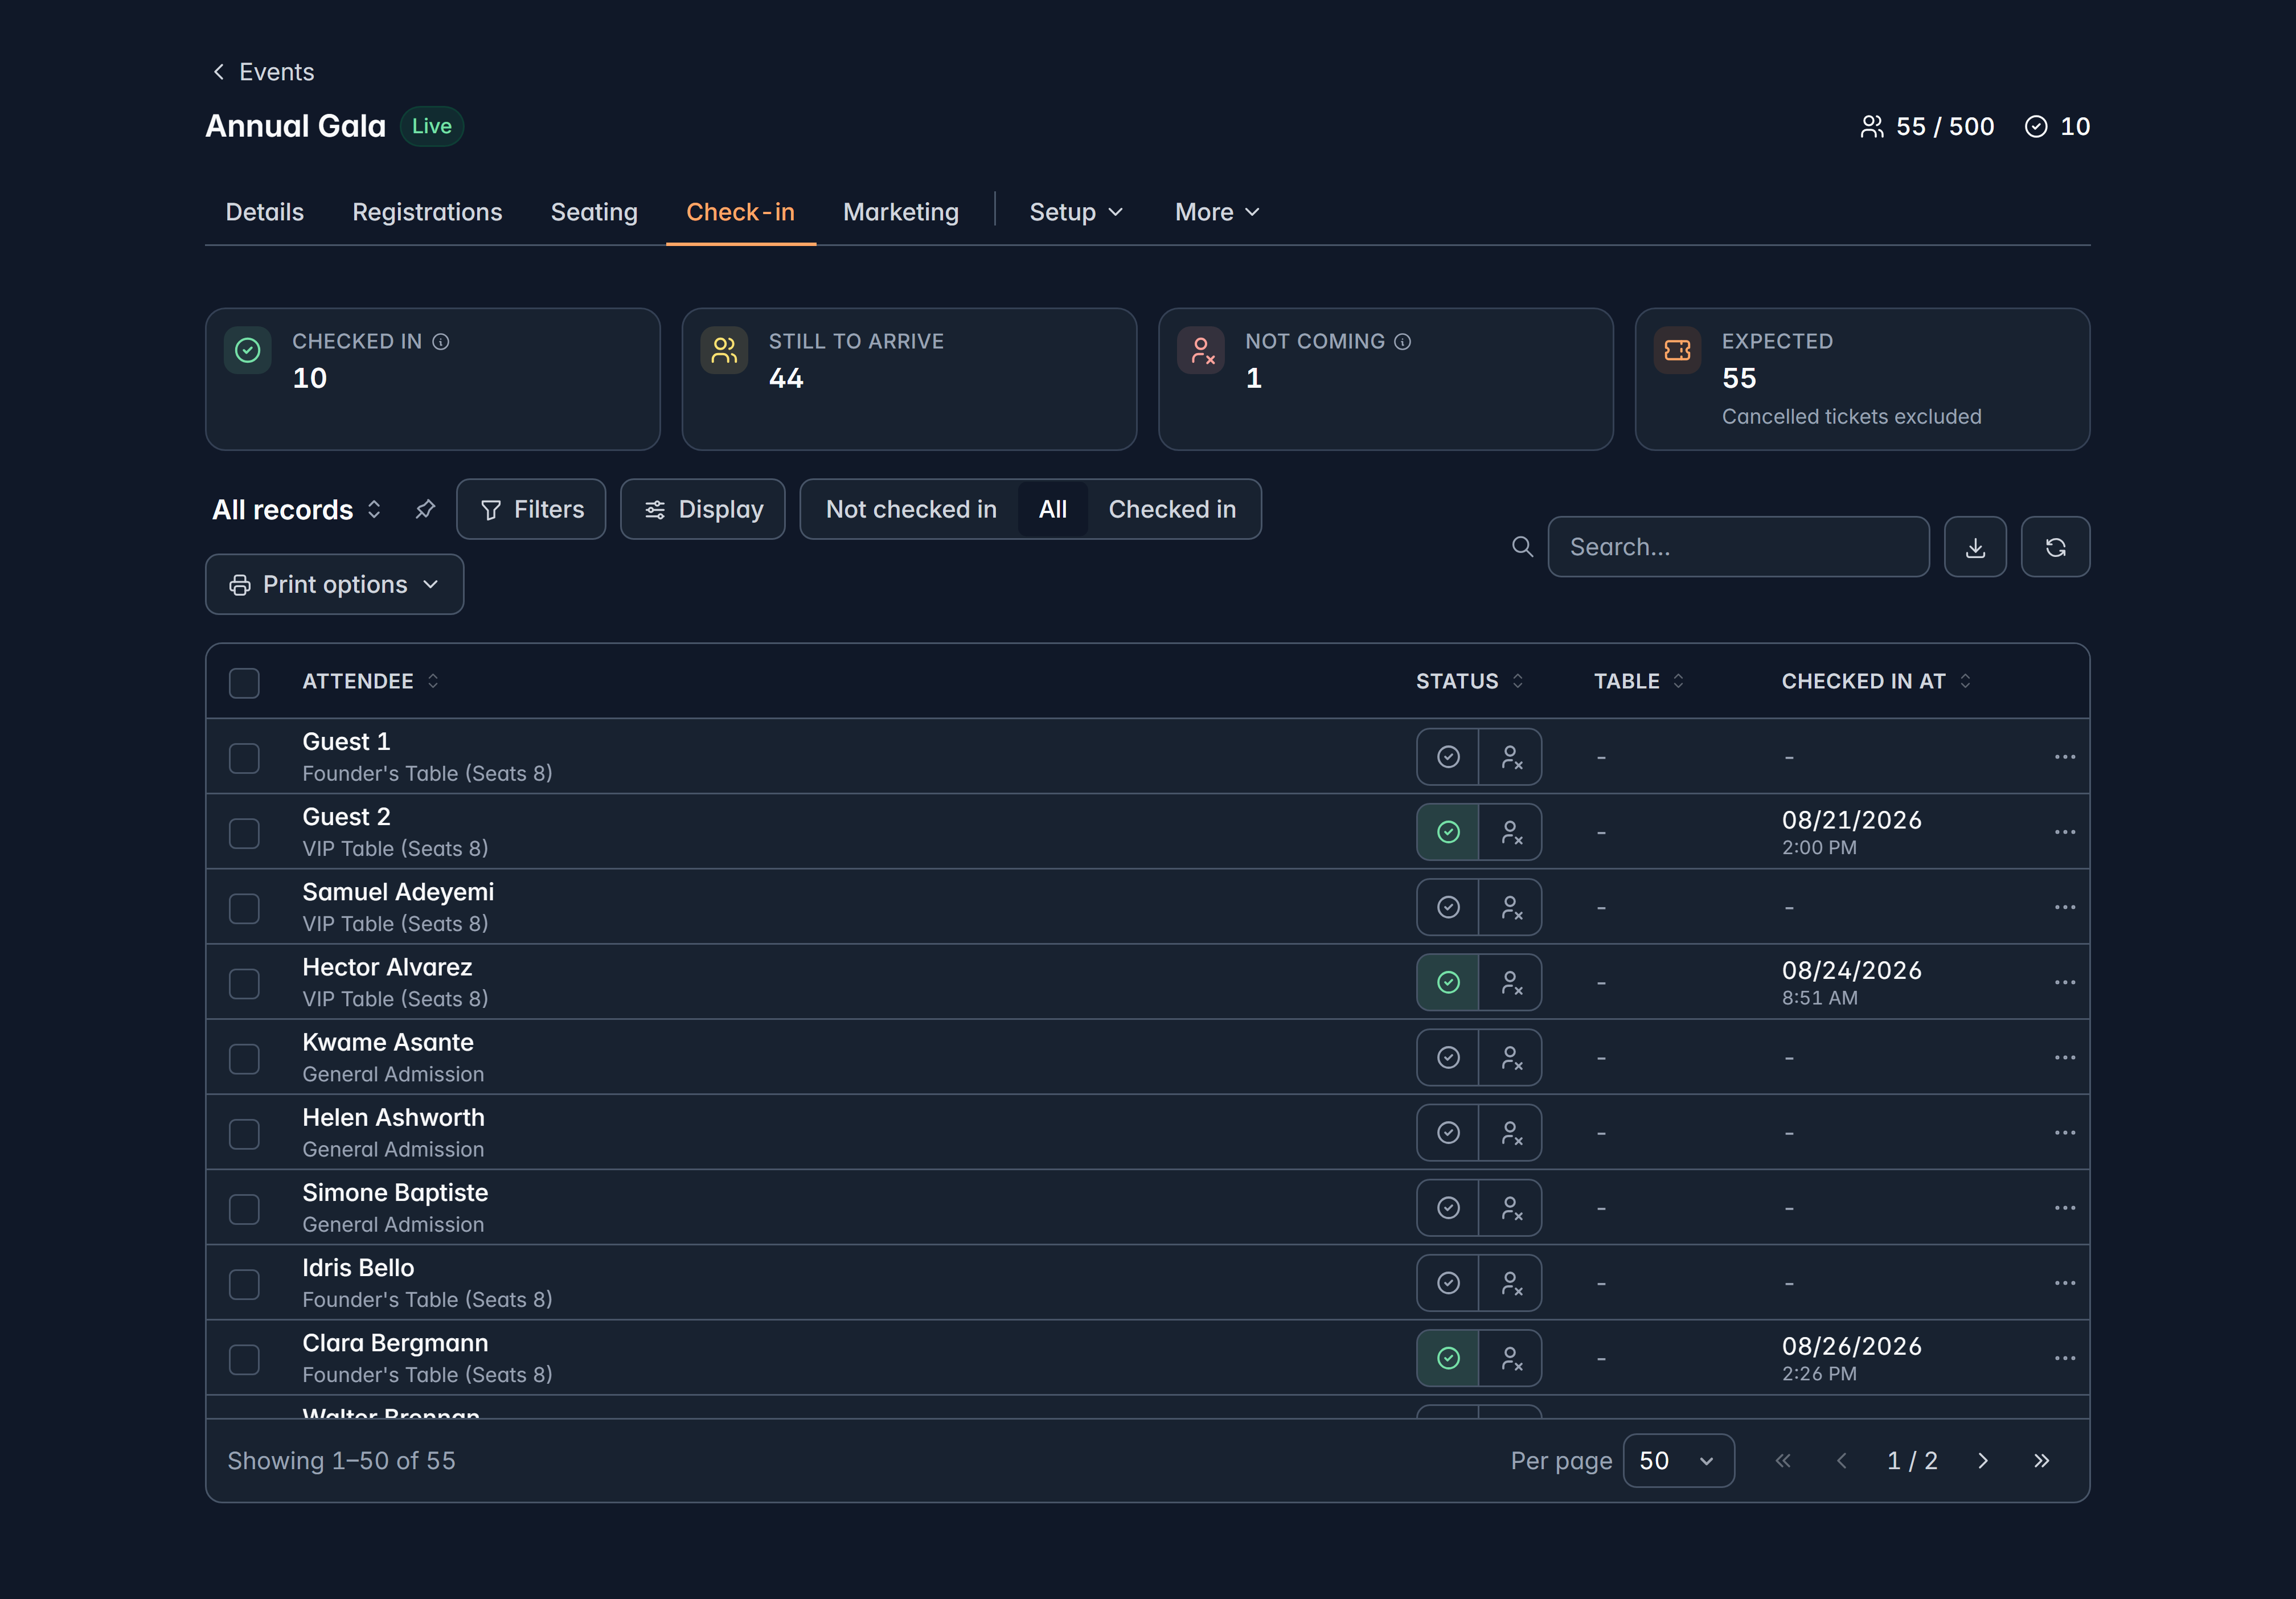
Four numbers across the top: Checked in, Still to arrive, Not coming, and Expected (which excludes cancelled tickets).
Then the list, filtered by Not checked in, All or Checked in. "Not checked in" is the view you want for most of the evening.
Check someone in
Find them
Search by name, email or ticket code. Scanning a printed badge jumps straight to them.
Check them in
Select the check-in control on their row. The counts at the top move as you go.
If they're already checked in, Givable says so and tells you they were done at another desk, so two desks never double-print or argue.
Scanning a badge jumps straight to that person. If you print badges in advance, scanning is much faster than typing, and it works on a phone.
Not coming
Marking someone not coming is a note for the door, not a cancellation: their ticket stays valid and they're still counted as expected. They stay on the All list, dimmed, so if they turn up after all you can undo it.
Undo is offered in the toast for a few seconds, and on their row after that.
Whole tables at once
Select several people and the toolbar offers Check in, Mark not coming, Print badges and Assign table.
Bulk check-in reports honestly: it tells you how many went through, how many were already in, how many need a signature and how many couldn't be checked in. Only the people it actually checked in get a badge.
Badges
Badge printing needs two things: at least one badge design for the event (Setup > Badges) and a desktop browser.
Print options in the toolbar controls:
- Auto-print badge on check-in, which is remembered for that browser on that device. Each desk decides for itself.
- A fallback badge design, used when an attendee's registration type has no design of its own. This one is set for the whole event, so every desk agrees.
- Print all badges, for printing ahead of time.
Which design is used, in order: the registration type's own badge, then the event's badge, then the fallback.
You can print as labels (one per page, for a label printer) or as a sheet (tiled onto label stock or plain paper as a PDF).
Set the badge printer as your computer's default printer before the doors open. Auto-print goes to the default, and a printer chooser popping up on every guest slows a queue to a crawl.
Waivers at the door
If a registration type requires a signature at check-in, pressing check in opens the signing screen, and the check-in completes once it's signed. For waivers emailed after checkout, the door warns you when one is unsigned.
One guest, in detail
Selecting a row opens their details: their ticket code, registration type, table, when they were checked in, how many badges have been printed, and the money on their booking.
Two useful things live here:
- Note for the door, free text shown on their row at check-in. It's never printed on a badge or emailed. Good for "arriving late" or "uses a wheelchair, seat near the door".
- Their answers to your questions, including staff-only ones, which you can edit on the spot.
Common door problems
Related
Seating and floor plans
Tables and where people sit.
Manage registrations
Balances, payments and refunds.
Still stuck?
We're here for you, and no question is too small. Tell us what you were trying to do and what happened, and we'll help you get it sorted.